Transplanting without stress (For you or your plants)
She had been staring at them for a week.
The seedlings were ready — she knew they were ready, her garden coach had told her they were ready — but every time she walked out to the raised bed with a trowel in hand, something stopped her. What if she planted them too deep? What if she disturbed the roots? What if it was too hot, or not hot enough, or the wrong day entirely?
She called me from her back porch, seedling tray in hand, slightly frozen.
"I just don't want to do it wrong," she said.
I hear this more than you might think. Getting to transplant day feels like such a milestone — you've grown these little plants from seed, or carefully selected them from the nursery, and now you're about to put them in the ground and commit. The pressure feels enormous. And underneath all of it is this quiet fear: what if I mess it up?
Here's what I told her, and what I want to tell you: transplanting is more forgiving than you think. Yes, there's a right way to do it. Yes, the details matter. But plants are resilient, and a little knowledge goes a long way toward both a successful transplant and a much calmer gardener.
So let's walk through it together.
Step One: Set Yourself Up for Success Before You Dig
Timing makes a huge difference when it comes to transplanting, and the good news is that the best time to transplant is also the most pleasant time to be in the garden.
Transplant in the evening. The sun is lower, temperatures are cooler, and your plants will have all night to settle into their new home before facing the heat and light of a full day. Morning works too if evenings aren't possible — just avoid transplanting in the heat of the afternoon, especially here in Northern Virginia where summer afternoons can be brutal.
Water your seedlings a few hours before transplanting. Moist root balls hold together better and experience less shock during the move. Dry roots are fragile and more easily disturbed.
Prepare your bed first. Have your holes dug, your spacing planned, and your watering can filled before you bring the seedlings outside. The less time the roots spend exposed to air, the better.
The Hardening Off Step You Cannot Skip
If your transplants have been living indoors — on a windowsill, under a grow light, or in a greenhouse — they need to be introduced to the outdoors gradually before they go in the ground. This process is called hardening off, and skipping it is one of the most common transplanting mistakes I see.
Indoor seedlings are essentially living in a sheltered, controlled environment. Direct sun, wind, and temperature fluctuations are all new stressors, and hitting them all at once can send a plant into serious shock.
Here's a simple hardening off schedule:
● Days 1-2: Set plants outside in a shaded, sheltered spot for 1-2 hours, then bring them back in
● Days 3-4: Increase to 3-4 hours, introducing a little gentle morning sun
● Days 5-6: Leave them outside for most of the day in a partly sunny spot
● Day 7+: They're ready for full sun and can be transplanted into the bed
If you bought transplants from a nursery that keeps plants outdoors, they're likely already hardened off — but it's worth asking, especially early in the season.
How to Actually Transplant Without Damaging Your Plants
Okay, trowel in hand. Here's how to do this with confidence:
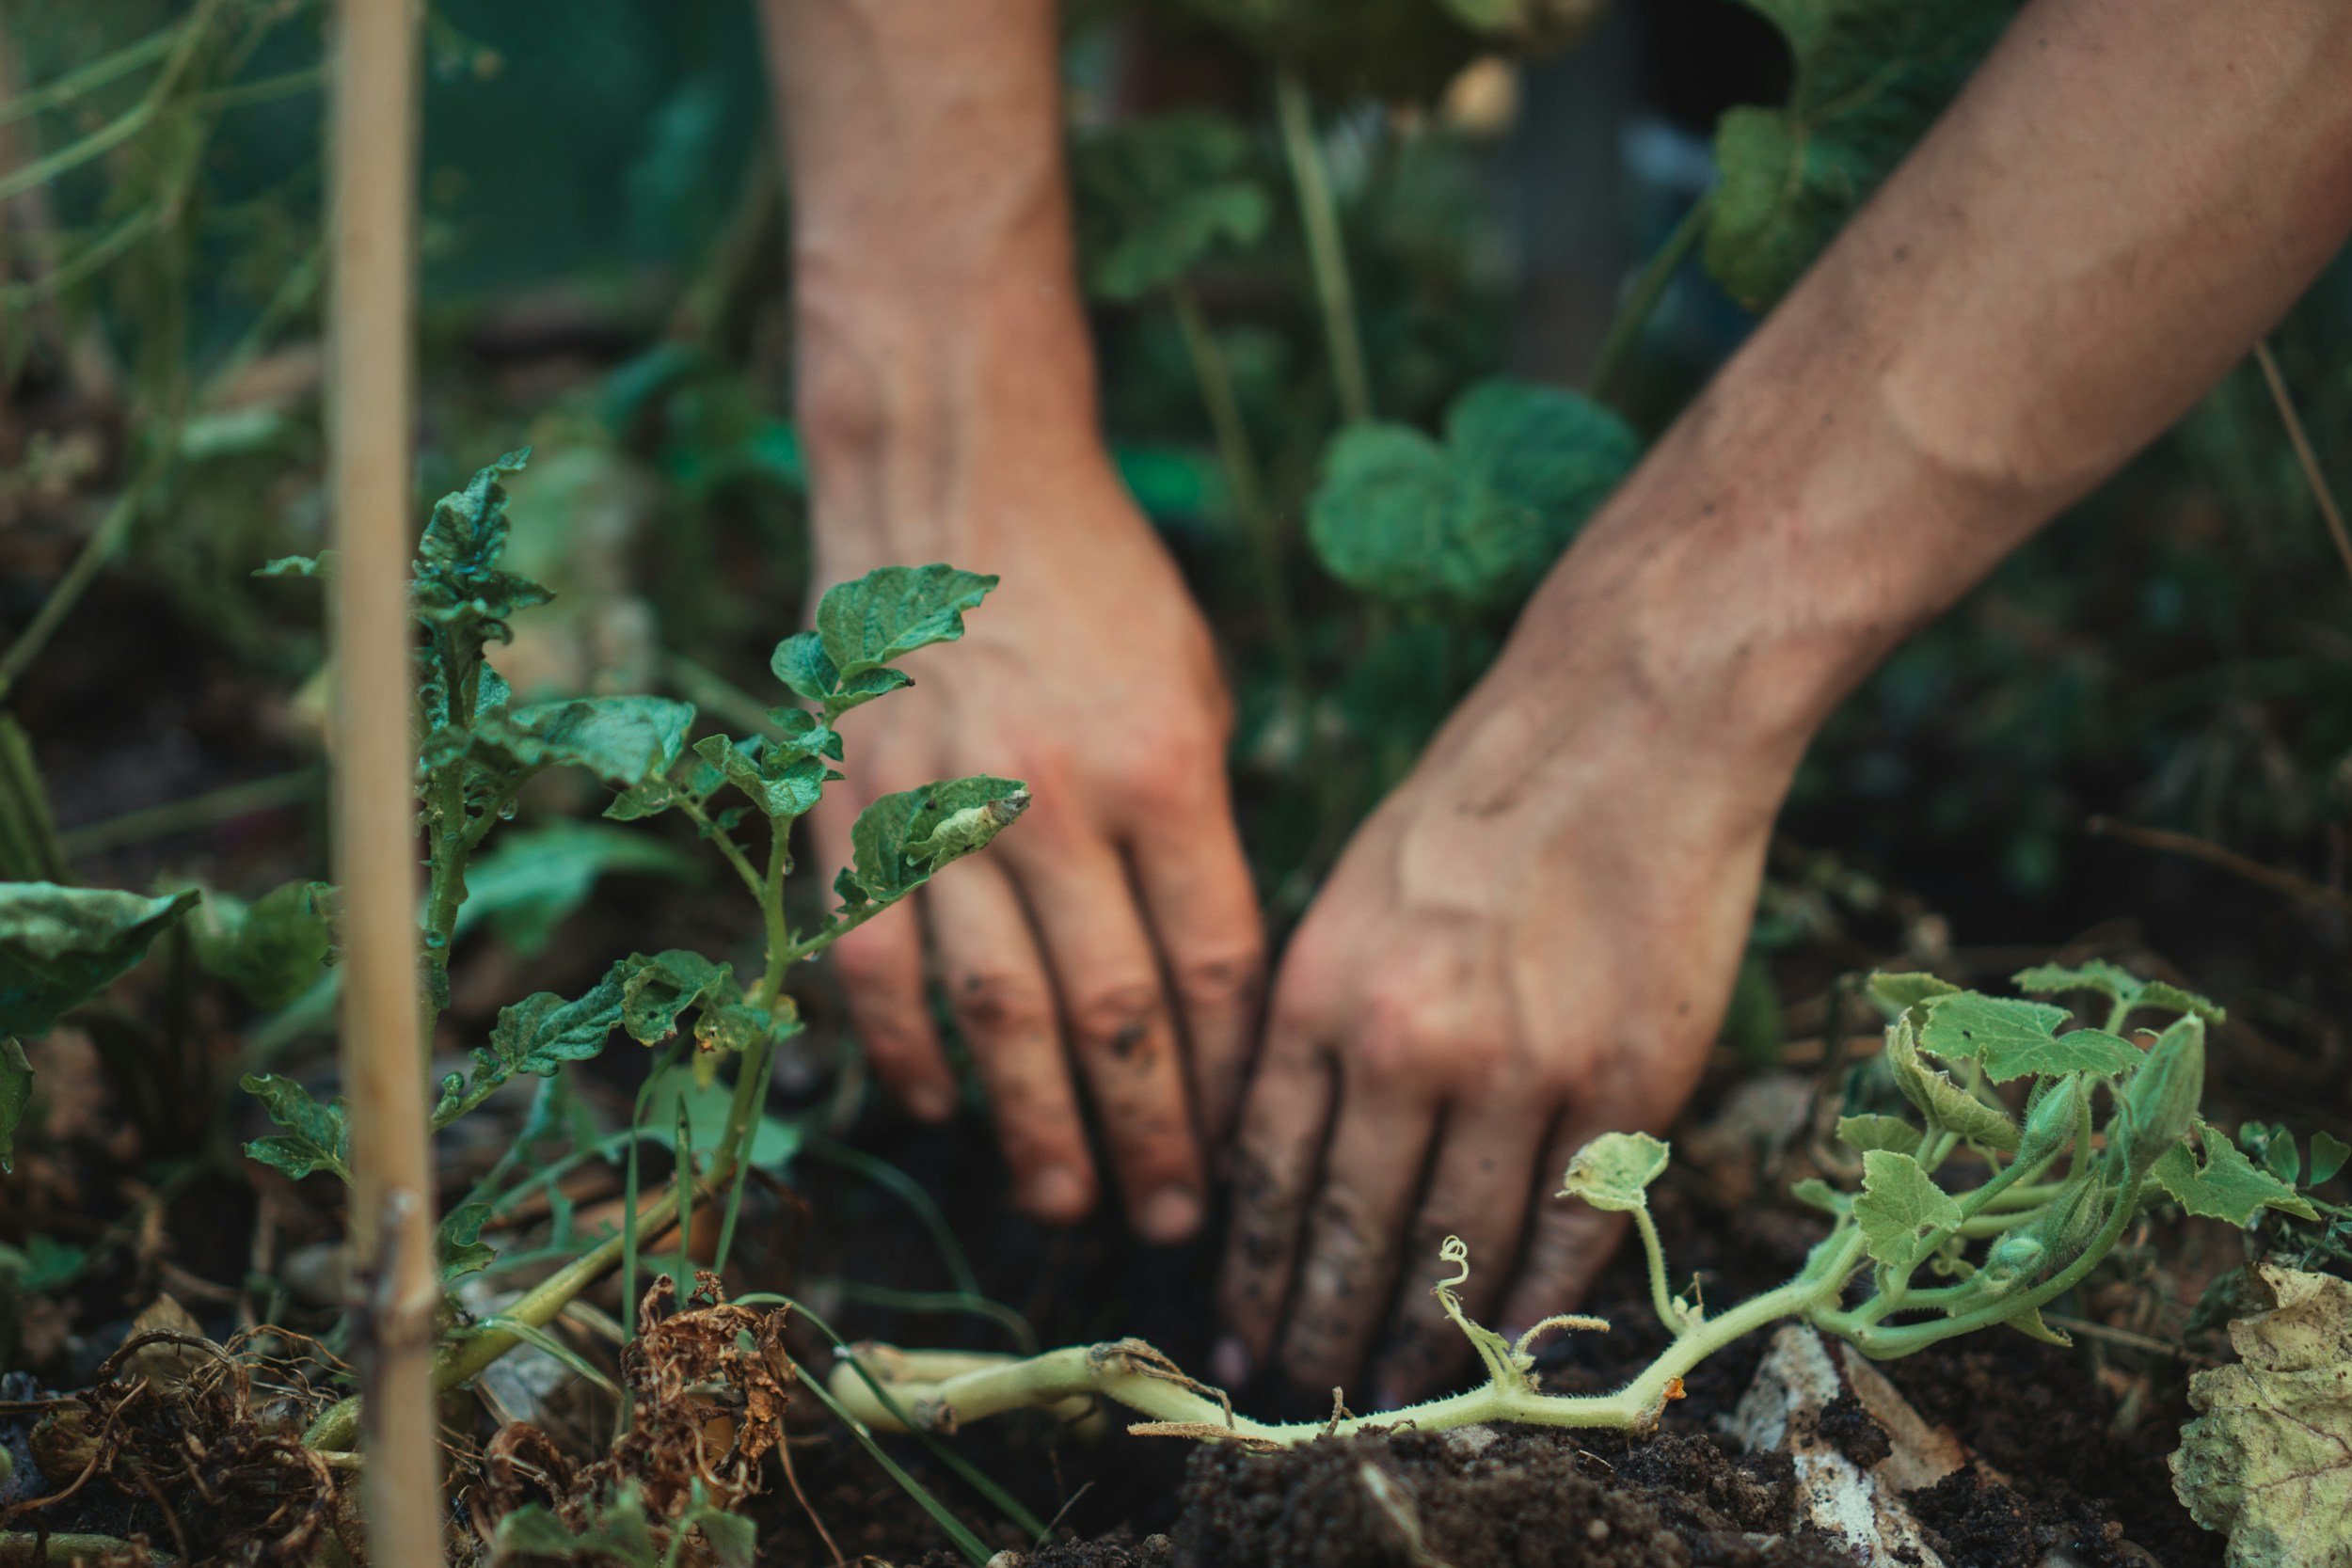
Dig your hole first, and make it bigger than you think you need. The roots should have room to spread without being forced or bent.
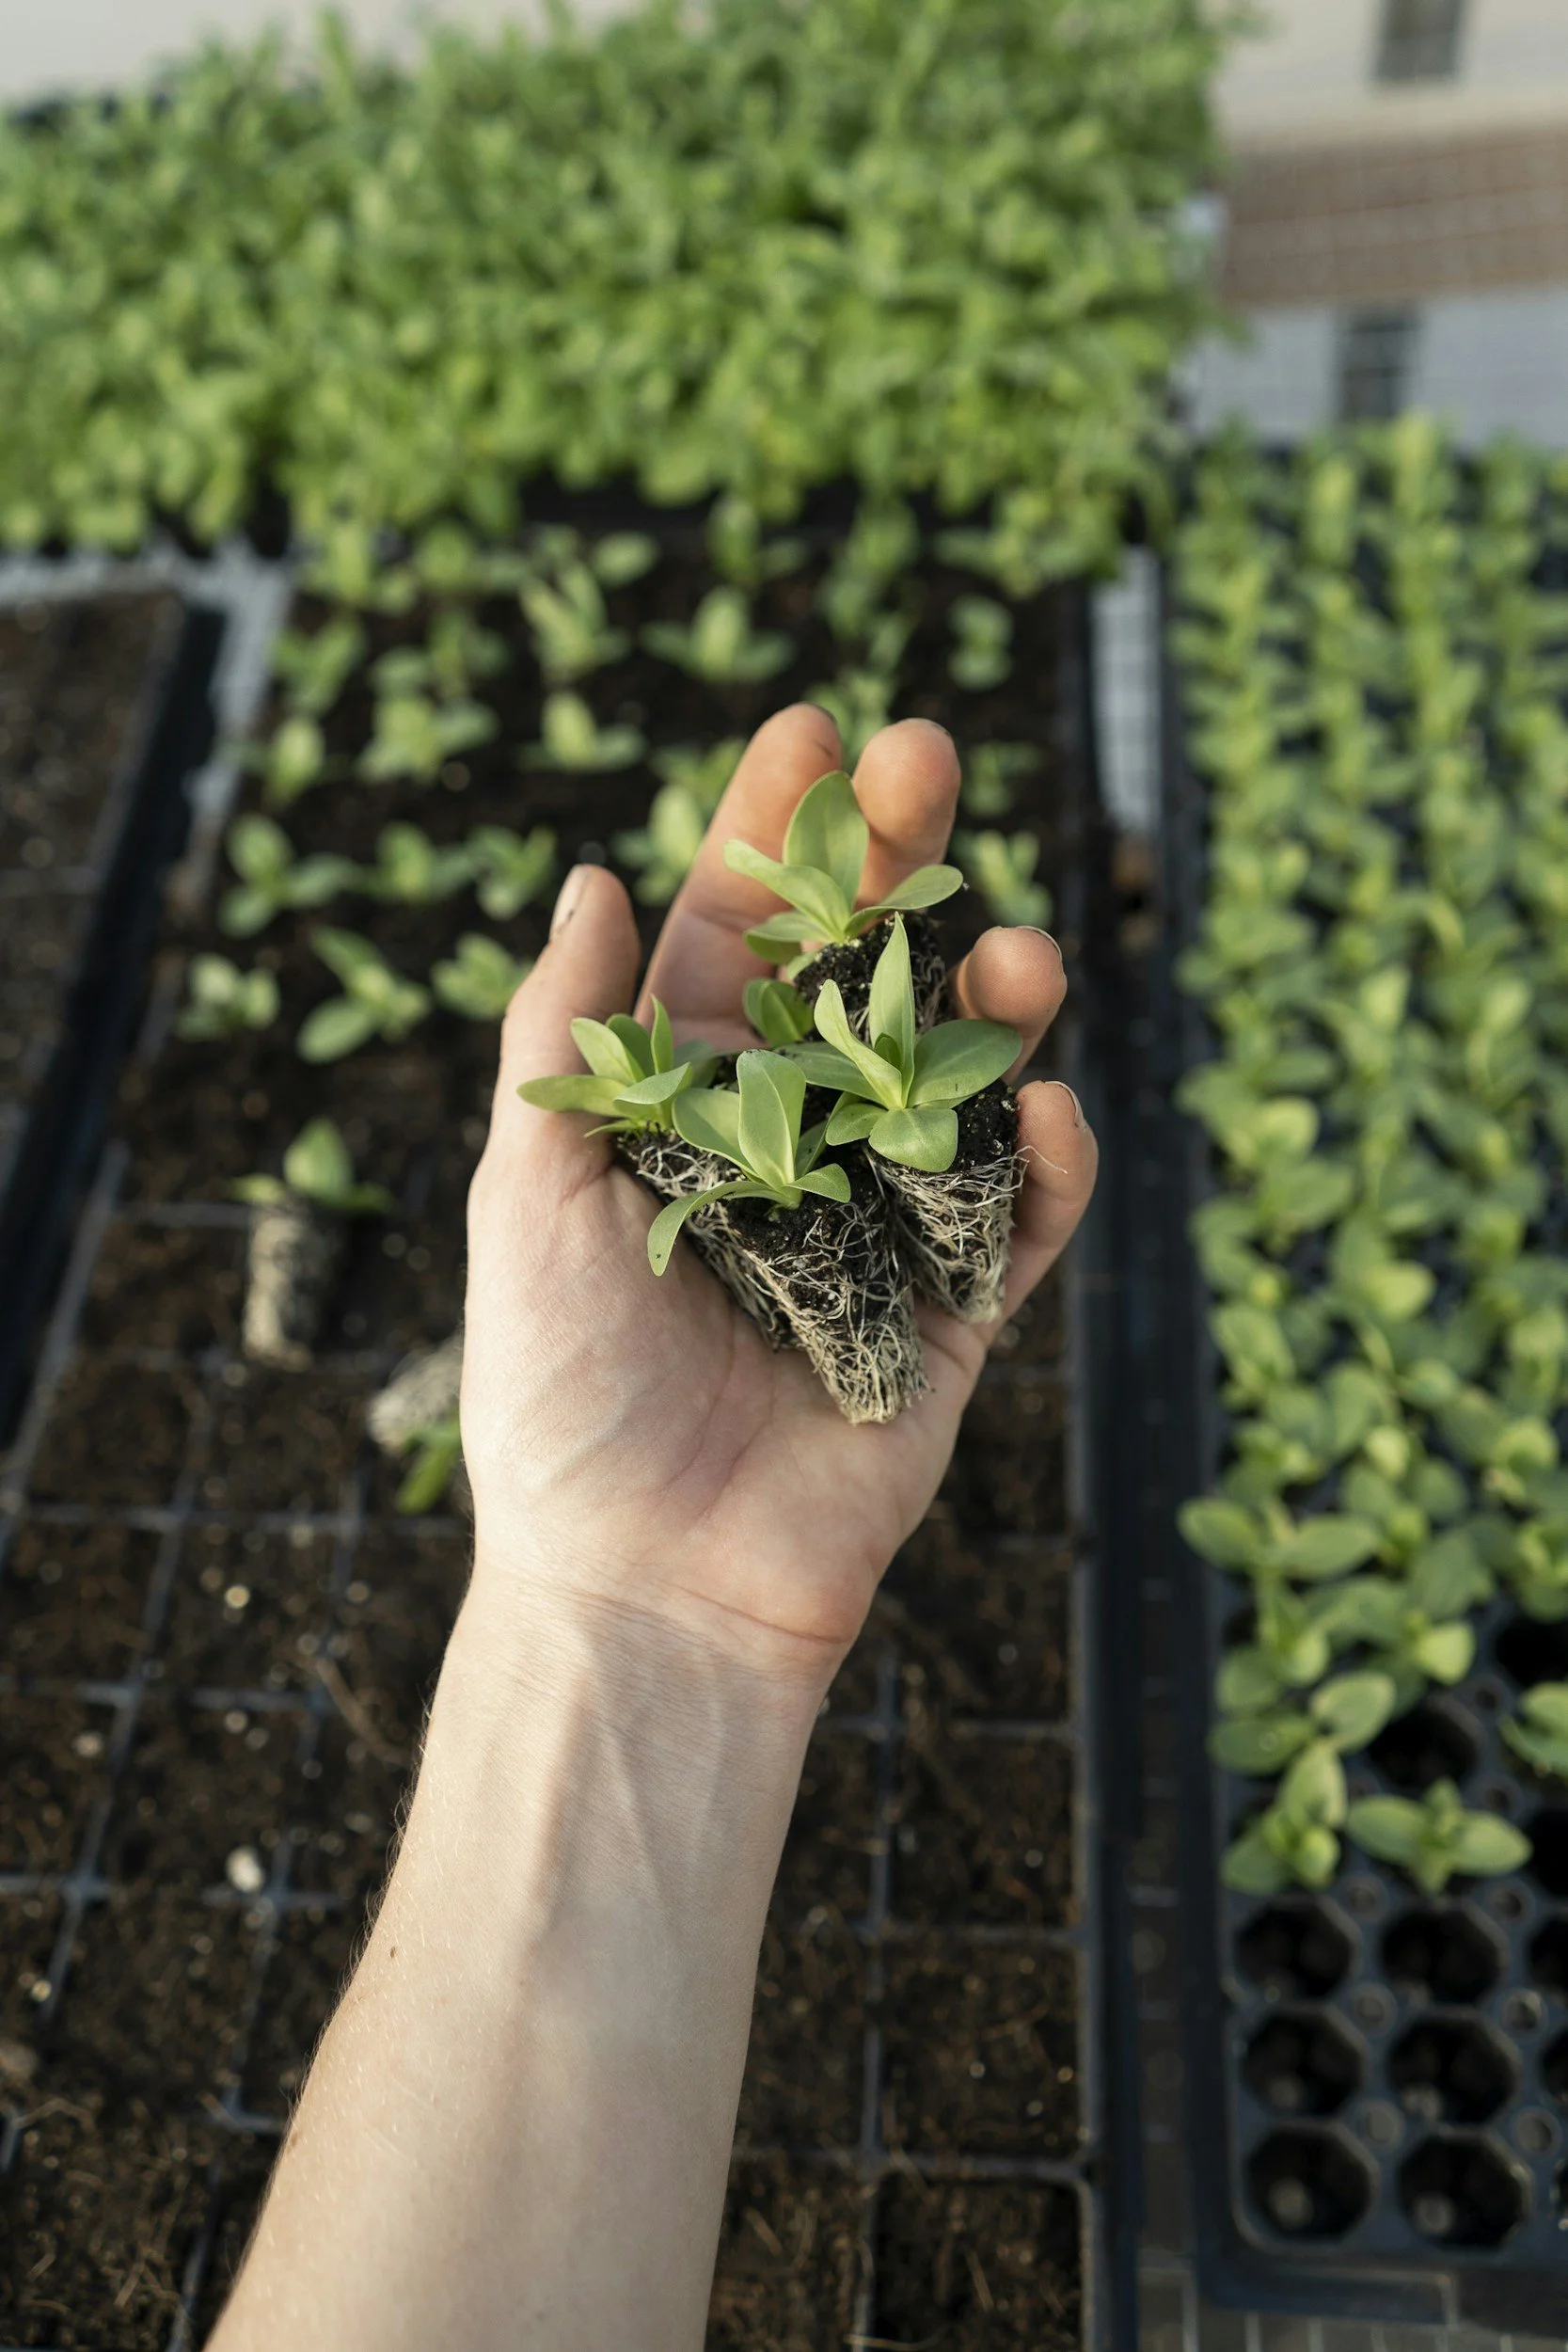
Handle seedlings by the root ball, not the stem. Stems are fragile and can be damaged with even gentle pressure. Cup the root ball from below and support it fully as you move it.
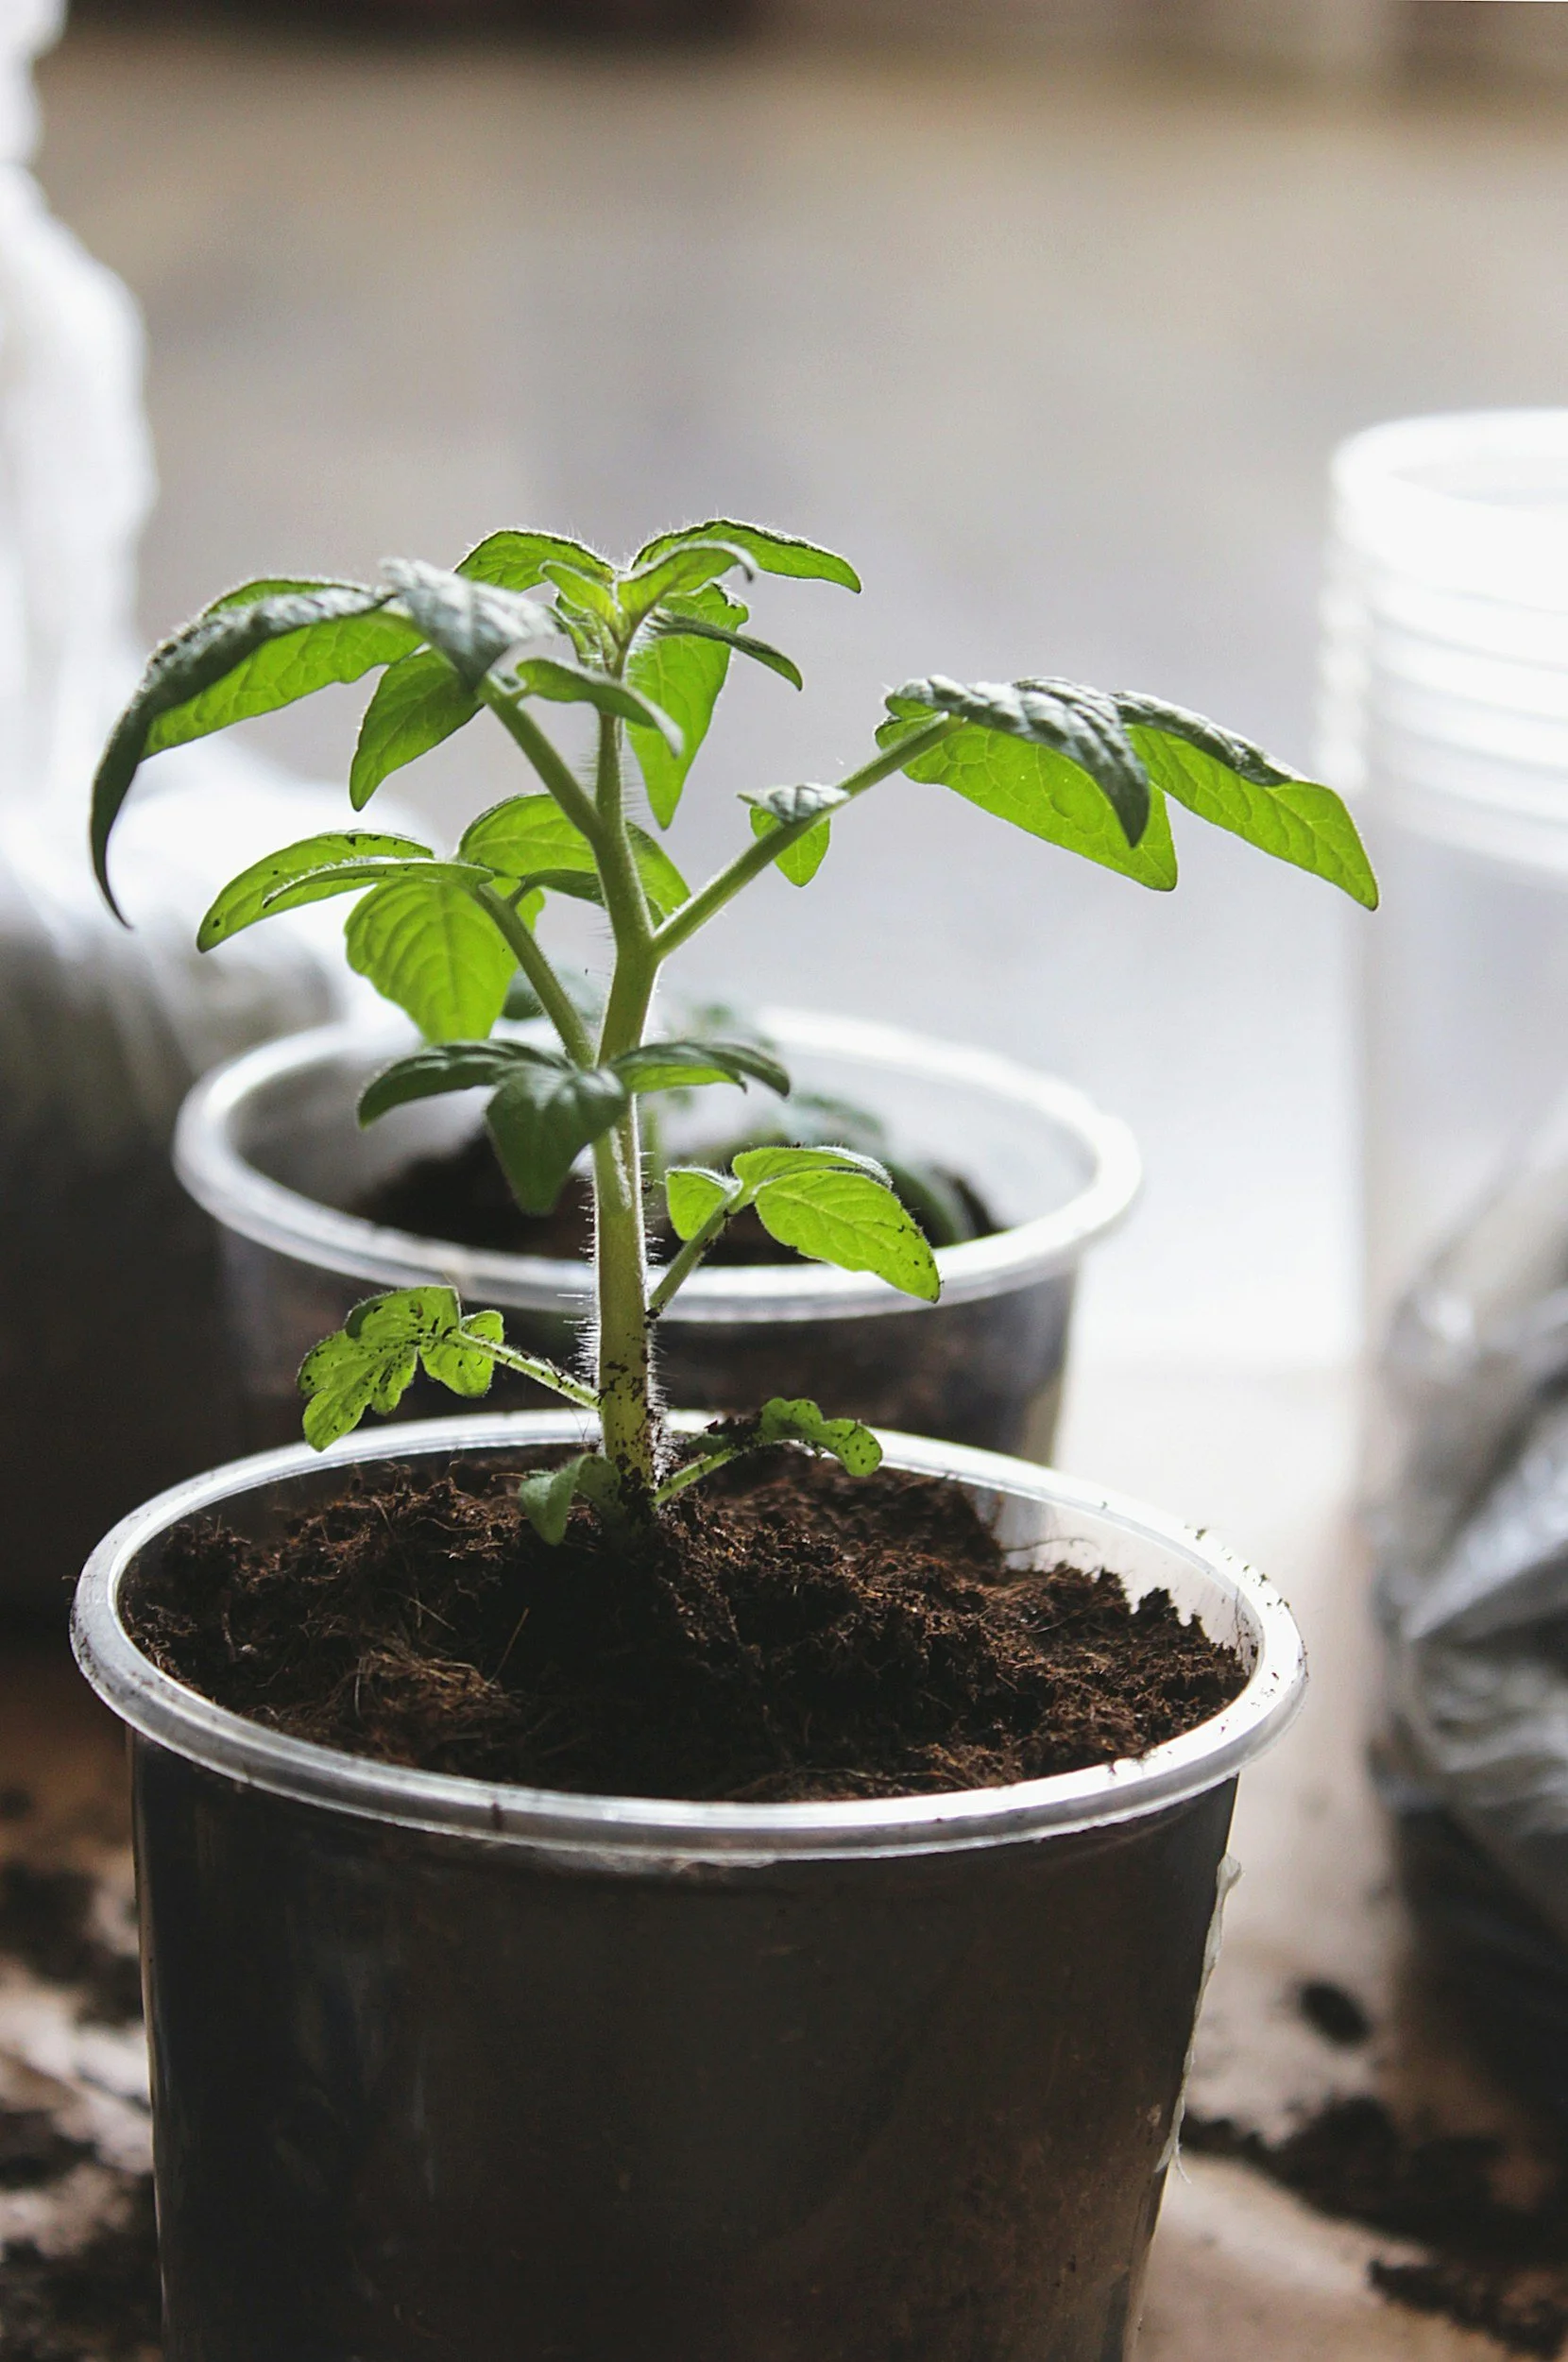
Plant at the right depth. Most vegetables go in at the same depth they were growing in their container — with one notable exception. Tomatoes love to be planted deeply, with the bottom two-thirds of the stem buried. They'll grow roots all along the buried stem and become stronger plants for it.
Firm the soil gently around the roots to eliminate air pockets, but don't compact it. You want good soil-to-root contact without squeezing out all the space roots need to grow.
Water immediately and thoroughly after planting. This settles the soil around the roots and gives the plant its first drink in its new home. Water at the base of the plant, not over the leaves.
Two Days Later: The Panic Text
This is where the story gets interesting.
Two days after our phone call, she texted me a photo. Her newly transplanted seedlings were wilted. Drooping. Looking, honestly, a little tragic.
"I think I killed them," she wrote. "They looked fine yesterday."
I smiled at my phone. Because I knew exactly what was happening.
Transplant shock is real, it's normal, and it does not mean your plants are dying.
When a plant is moved from one environment to another, it goes through a period of adjustment. The roots have been disturbed, the conditions have changed, and the plant temporarily struggles to take up water efficiently — even when water is available. The result is wilting, drooping, and sometimes some yellowing of the lower leaves. It can look alarming.
But here's what to do:
● Don't panic and don't overwater. Check the soil first — if it's moist, the plant has what it needs. Extra water won't speed up recovery and can cause new problems.
● Provide some shade if possible. A few days of filtered light gives stressed plants a chance to recover without the added pressure of full sun.
● Give it 3-5 days. Most plants bounce back from transplant shock within a week. You'll see new growth as the signal that roots have established and recovery is underway.
● Remove any badly damaged leaves to reduce stress on the plant, but otherwise — leave it alone. Rest is the best medicine.
She checked in four days later with a new photo. The plants were upright, green, and putting out new growth.
"I almost pulled them," she said.
I know. They almost always make it.
A Few Extra Tips for Northern Virginia Gardeners
Our climate adds a few extra considerations worth keeping in mind:
Watch the forecast. If temperatures are set to spike above 90°F in the days after transplanting, consider waiting or providing temporary shade cloth to protect new transplants while they settle in.
Mulch after transplanting. A layer of straw or shredded leaves around the base of your plants helps retain soil moisture, regulate temperature, and reduce stress on newly planted roots.
Don't fertilize immediately. Wait until you see new growth before feeding — a sign that roots have established and the plant is ready to grow. Fertilizing a stressed plant can do more harm than good.
You've Got This
Transplanting is one of those garden tasks that feels intimidating the first time and becomes second nature by the third. The fear of doing it wrong is almost always bigger than the actual risk.
Take your time. Transplant in the evening. Handle your plants gently. Water them in well. And then — this is the important part — step back and let them do what plants do.
They're tougher than they look. And so are you.
If you'd like personalized guidance through your first transplanting season, my Garden Coaching services are here for exactly this kind of thing — real support for real gardeners in real Northern Virginia gardens. And the Homegrown Guild is always open if you want a community to cheer you on.